调试配置
昨天写完printk函数后很有可能遇到bug,当遇到bug的时候怎样来调试呢,现在就来配置一下
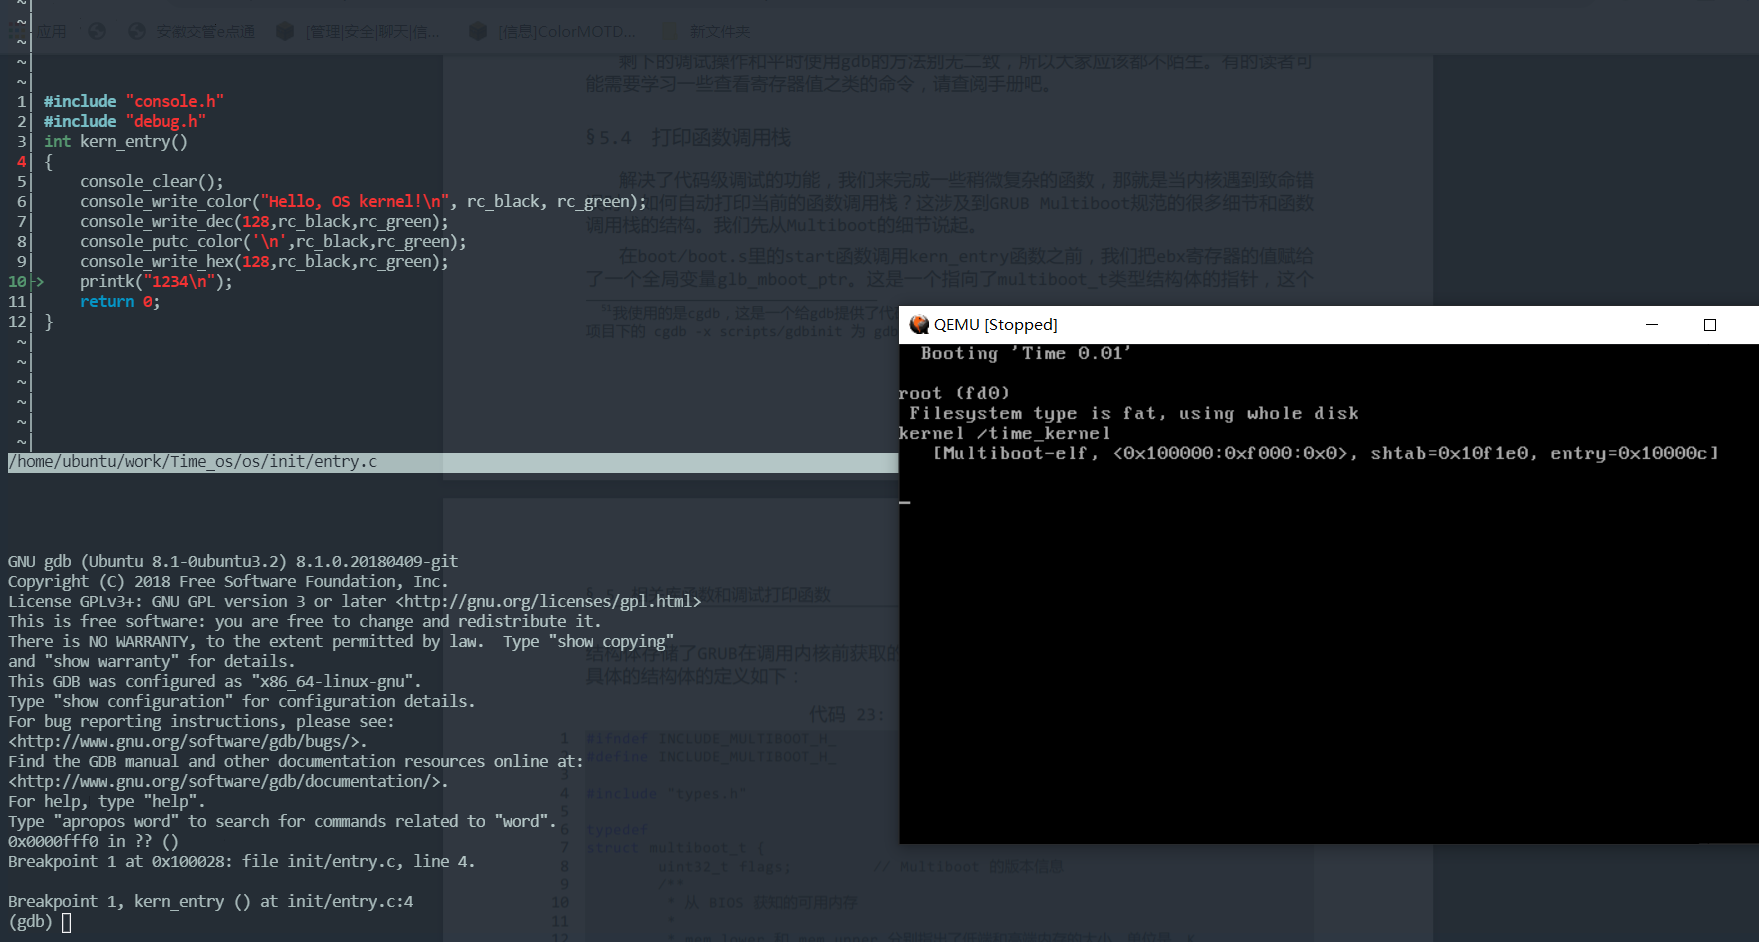
gdb调试
qemu可以以调试模式启动配合gdb来进行调试,当然cgdb更加好用一些
qemu的调试模式命令是
1
| qemu -S -s -fda floppy.img -boot a
|
-S是让qemu不要继续运行,等待gdb的运行指令,-s是开启1234端口等待gdb连接
开启gdb后就执行一下命令
1
2
3
4
| file time_kernel
target remote :1234
break kern_entry
c
|
第一句是指定可执行文件,第二句是连接本地的1234端口,第三句是在kern_entry函数处设置断点,最后c是continue执行到断点处
这些可以写到一个脚本里,然后开启cgdb后自动执行
注意gdb加载脚本的时间一定要在qemu打开以后,不然会报错
打印函数调用栈
我们现在来实现一个当内核出现致命错误时自动打印函数调用栈的函数
在boot/boot.s里的start函数调用kern_entry函数之前,我们把ebx寄存器的值赋给了一个全局变量glb_mboot_ptr。这是一个指向了multiboot_t类型结构体的指针,这个结构体存储了GRUB在调用内核前获取的硬件信息和内核文件本身的一些信息。我们先给出具体的结构体的定义如下:
include/multiboot.h
1
2
3
4
5
6
7
8
9
10
11
12
13
14
15
16
17
18
19
20
21
22
23
24
25
26
27
28
29
30
31
32
33
34
35
36
37
38
39
40
41
42
43
44
45
46
47
48
49
50
51
52
53
54
55
56
57
58
59
60
61
62
63
64
65
66
67
68
69
70
71
72
73
74
| #ifndef INCLUDE_MULTIBOOT_H_
#define INCLUDE_MULTIBOOT_H_
#include "types.h"
typedef
struct multiboot_t {
uint32_t flags;
uint32_t mem_lower;
uint32_t mem_upper;
uint32_t boot_device;
uint32_t cmdline;
uint32_t mods_count;
uint32_t mods_addr;
uint32_t num;
uint32_t size;
uint32_t addr;
uint32_t shndx;
uint32_t mmap_length;
uint32_t mmap_addr;
uint32_t drives_length;
uint32_t drives_addr;
uint32_t config_table;
uint32_t boot_loader_name;
uint32_t apm_table;
uint32_t vbe_control_info;
uint32_t vbe_mode_info;
uint32_t vbe_mode;
uint32_t vbe_interface_seg;
uint32_t vbe_interface_off;
uint32_t vbe_interface_len;
} __attribute__((packed)) multiboot_t;
typedef
struct mmap_entry_t {
uint32_t size;
uint32_t base_addr_low;
uint32_t base_addr_high;
uint32_t length_low;
uint32_t length_high;
uint32_t type;
} __attribute__((packed)) mmap_entry_t;
extern multiboot_t *glb_mboot_ptr;
#endif
|
我们主要关心ELF那一段
1
2
3
4
5
6
7
8
|
uint32_t num;
uint32_t size;
uint32_t addr;
uint32_t shndx;
|
我们先添加elf.h这个头文件
include/elf.h
1
2
3
4
5
6
7
8
9
10
11
12
13
14
15
16
17
18
19
20
21
22
23
24
25
26
27
28
29
30
31
32
33
34
35
36
37
38
39
40
41
42
43
44
45
46
47
48
49
50
| #ifndef INCLUDE_ELF_H_
#define INCLUDE_ELF_H_
#include "types.h"
#include "multiboot.h"
#define ELF32_ST_TYPE(i) ((i)&0xf)
typedef
struct elf_section_header_t {
uint32_t name;
uint32_t type;
uint32_t flags;
uint32_t addr;
uint32_t offset;
uint32_t size;
uint32_t link;
uint32_t info;
uint32_t addralign;
uint32_t entsize;
} __attribute__((packed)) elf_section_header_t;
typedef
struct elf_symbol_t {
uint32_t name;
uint32_t value;
uint32_t size;
uint8_t info;
uint8_t other;
uint16_t shndx;
} __attribute__((packed)) elf_symbol_t;
typedef
struct elf_t {
elf_symbol_t *symtab;
uint32_t symtabsz;
const char *strtab;
uint32_t strtabsz;
} elf_t;
elf_t elf_from_multiboot(multiboot_t *mb);
const char *elf_lookup_symbol(uint32_t addr, elf_t *elf);
#endif
|
这段结构体定义了ELF的区段头符号表等内容,然后我们要从multiboot_t结构体中提取ELF相关信息
kernel/debug/elf.c
1
2
3
4
5
6
7
8
9
10
11
12
13
14
15
16
17
18
19
20
21
22
23
24
25
26
27
28
29
30
31
32
33
34
35
36
37
38
39
40
41
42
43
| #include "common.h"
#include "string.h"
#include "elf.h"
elf_t elf_from_multiboot(multiboot_t *mb)
{
int i;
elf_t elf;
elf_section_header_t *sh = (elf_section_header_t *)mb->addr;
uint32_t shstrtab = sh[mb->shndx].addr;
for (i = 0; i < mb->num; i++) {
const char *name = (const char *)(shstrtab + sh[i].name);
if (strcmp(name, ".strtab") == 0) {
elf.strtab = (const char *)sh[i].addr;
elf.strtabsz = sh[i].size;
}
if (strcmp(name, ".symtab") == 0) {
elf.symtab = (elf_symbol_t*)sh[i].addr;
elf.symtabsz = sh[i].size;
}
}
return elf;
}
const char *elf_lookup_symbol(uint32_t addr, elf_t *elf)
{
int i;
for (i = 0; i < (elf->symtabsz / sizeof(elf_symbol_t)); i++) {
if (ELF32_ST_TYPE(elf->symtab[i].info) != 0x2) {
continue;
}
if ( (addr >= elf->symtab[i].value) && (addr < (elf->symtab[i].value + elf->symtab[i].size)) ) {
return (const char *)((uint32_t)elf->strtab + elf->symtab[i].name);
}
}
return NULL;
}
|
说实话这些我没太弄懂,想弄明白自己去看文档吧,我不太懂没啥能解释的2333
用objdump文件反汇编生成的内核
1
| objdump -M intel -d time_kernel
|
可以简化kern_entry函数的内容来让分析更简单
具体的分析过程文档写得很详细,我就不复述了,需要理解的就是函数开头那一块
1
2
3
| 100028: 55 push ebp
100029: 89 e5 mov ebp,esp
10002c: 83 ec 04 sub esp,0x4
|
esp是栈顶指针,在函数一开始先保存原来的ebp,然后将当前栈顶指针赋值给ebp,然给局部变量分配空间(移动栈顶指针),这样一来在EBP上方分别是原来的EBP,返回地址和参数EBP下方则是临时变量
然后返回时只需要将栈顶指针移动回来(mov esp ebp) ,然后恢复ebp的值(pop ebp) 最后ret就行了
所以我们只需要拿到当前ebp的值就可以沿着调用链获取所有函数
include/debug.h
1
2
3
4
5
6
7
8
9
10
11
12
13
14
15
16
17
18
19
20
21
22
23
24
25
26
27
28
29
30
31
32
33
34
| #ifndef INCLUDE_DEBUG_H_
#define INCLUDE_DEBUG_H_
#include "console.h"
#include "vargs.h"
#include "elf.h"
#define assert(x, info) \
do { \
if (!(x)) { \
panic(info); \
} \
} while (0)
#define static_assert(x) \
switch (x) { case 0: case (x): ; }
void init_debug();
void panic(const char *msg);
void print_cur_status();
void printk(const char *format, ...);
void printk_color(real_color_t back, real_color_t fore, const char *format, ...);
#endif
|
kernel/debug/debug.c
1
2
3
4
5
6
7
8
9
10
11
12
13
14
15
16
17
18
19
20
21
22
23
24
25
26
27
28
29
30
31
32
33
34
35
36
37
38
39
40
41
42
43
44
45
46
47
48
49
50
51
52
| #include "debug.h"
static void print_stack_trace();
static elf_t kernel_elf;
void init_debug()
{
kernel_elf = elf_from_multiboot(glb_mboot_ptr);
}
void print_cur_status()
{
static int round = 0;
uint16_t reg1, reg2, reg3, reg4;
asm volatile ( "mov %%cs, %0;"
"mov %%ds, %1;"
"mov %%es, %2;"
"mov %%ss, %3;"
: "=m"(reg1), "=m"(reg2), "=m"(reg3), "=m"(reg4));
printk("%d: @ring %d\n", round, reg1 & 0x3);
printk("%d: cs = %x\n", round, reg1);
printk("%d: ds = %x\n", round, reg2);
printk("%d: es = %x\n", round, reg3);
printk("%d: ss = %x\n", round, reg4);
++round;
}
void panic(const char *msg)
{
printk("*** System panic: %s\n", msg);
print_stack_trace();
printk("***\n");
while(1);
}
void print_stack_trace()
{
uint32_t *ebp, *eip;
asm volatile ("mov %%ebp, %0" : "=r" (ebp));
while (ebp) {
eip = ebp + 1;
printk(" [0x%x] %s\n", *eip, elf_lookup_symbol(*eip, &kernel_elf));
ebp = (uint32_t*)*ebp;
}
}
|
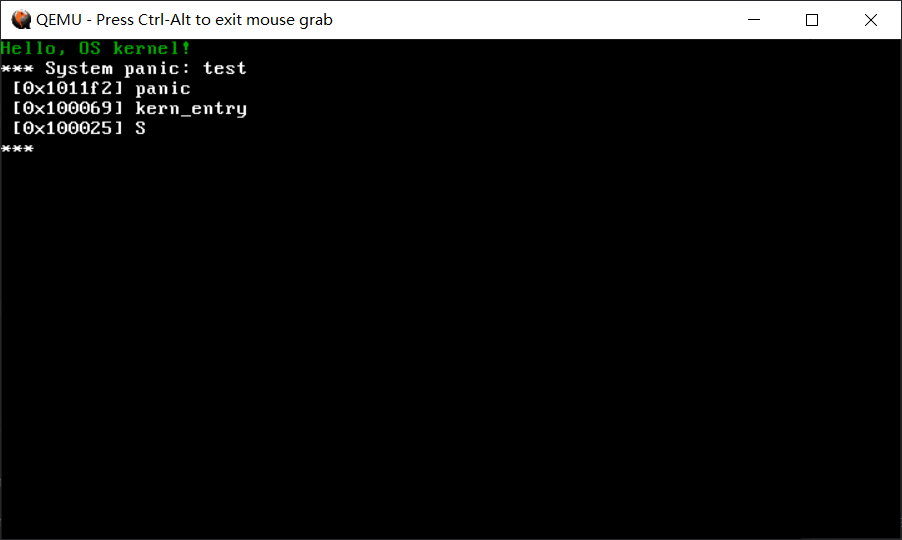
改写init/entry.c测试一下
1
2
3
4
5
6
7
8
9
10
11
12
13
14
15
| #include "console.h"
#include "debug.h"
int kern_entry()
{
init_debug();
console_clear();
printk_color(rc_black, rc_green, "Hello, OS kernel!\n");
panic("test");
return 0;
}
|
最后的效果